I splurged this fall. One little idea spotted on Pinterest that used wood veneer, and I went down the rabbit hole. After tons of research, I purchased a Cricut Maker 3.
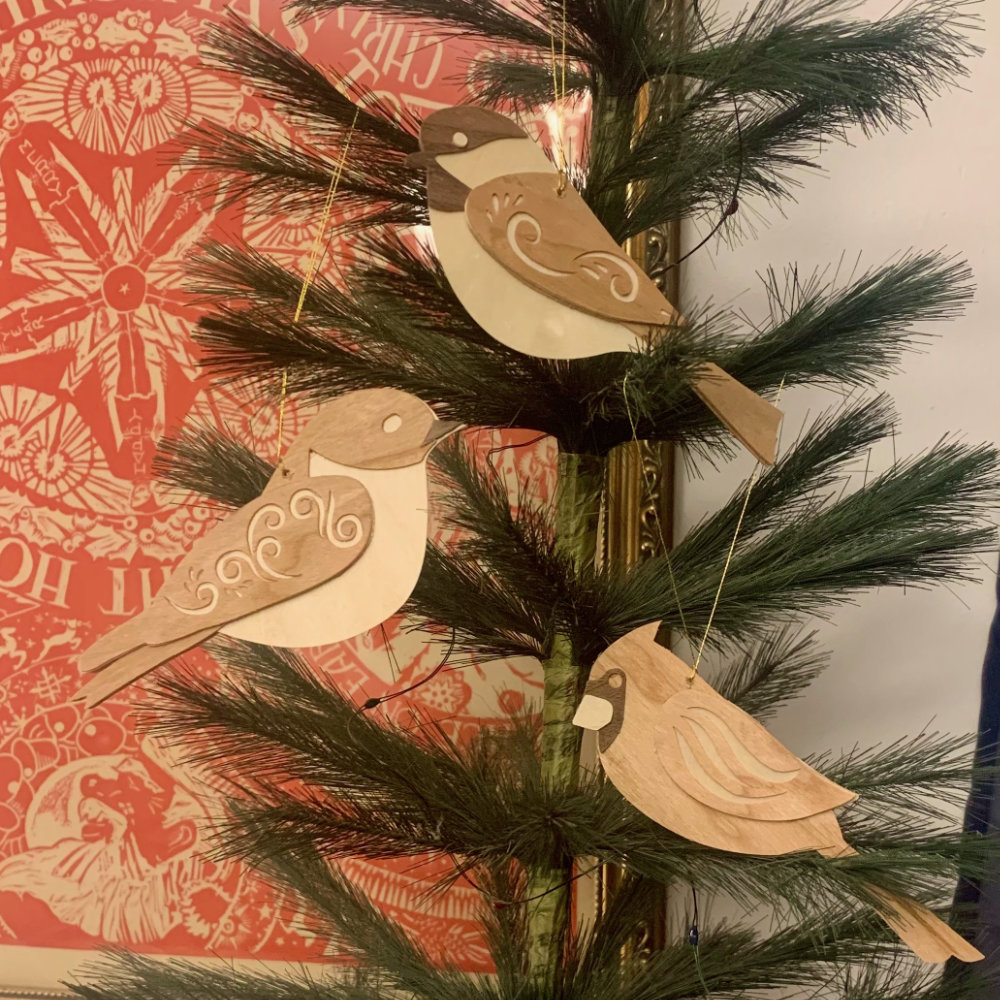
A couple of small projects behind me, and I started devising wooden birds from my designs. It took some experimentation and missteps before I sorted out the process and pattern.
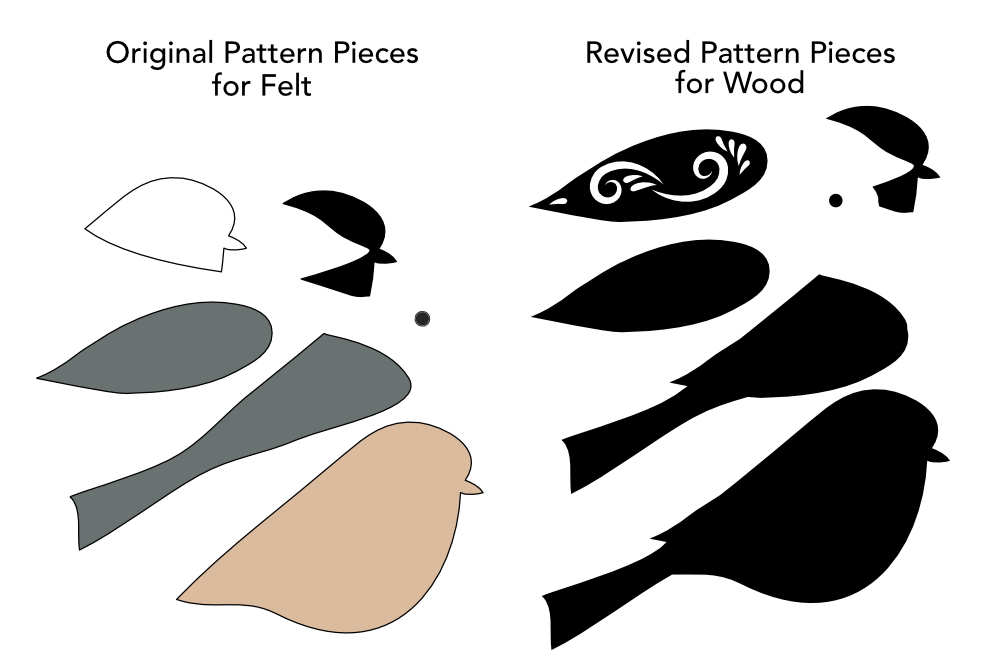
My felt bird designs have lots of overlap of pieces while trying not to have so many layers that they are difficult to sew. When I attempted to cut out a pattern and cut it from wood veneer, I discovered that while felt pieces merge nicely, the wood pattern pieces all need to fit flat against each other. If there is any overlap, the part beneath needs to support the piece above fully. I revised my designs for the Chickadee, Cardinal, and Bluebird for the Cricut Design Space. I simplified them into three colors/wood tones to fit like interconnecting puzzle pieces. I use Affinity Design to create the designs and then the SVG files required for cutting.
The wood veneer is called wood paper and is from Real Wood Paper. I used walnut for my dark color, cherry for my medium color, and maple for my light color. The wood paper comes in a few different styles – I opted for a wood-backed veneer for thickness rather than paper or felt-backed.
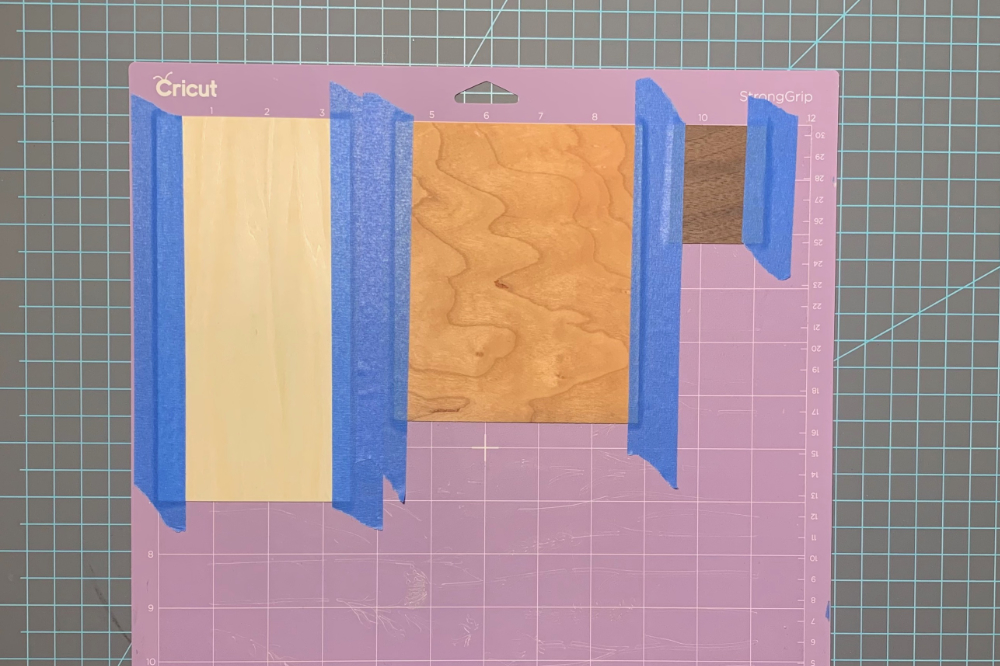
When planning my cut for an individual bird, I didn’t want to cut three different material mats, so I merged the three wood types onto one Cricut mat. Even with an ultra-sticky mat, you need to tape the veneer to the mat to keep it from moving around during the cut.
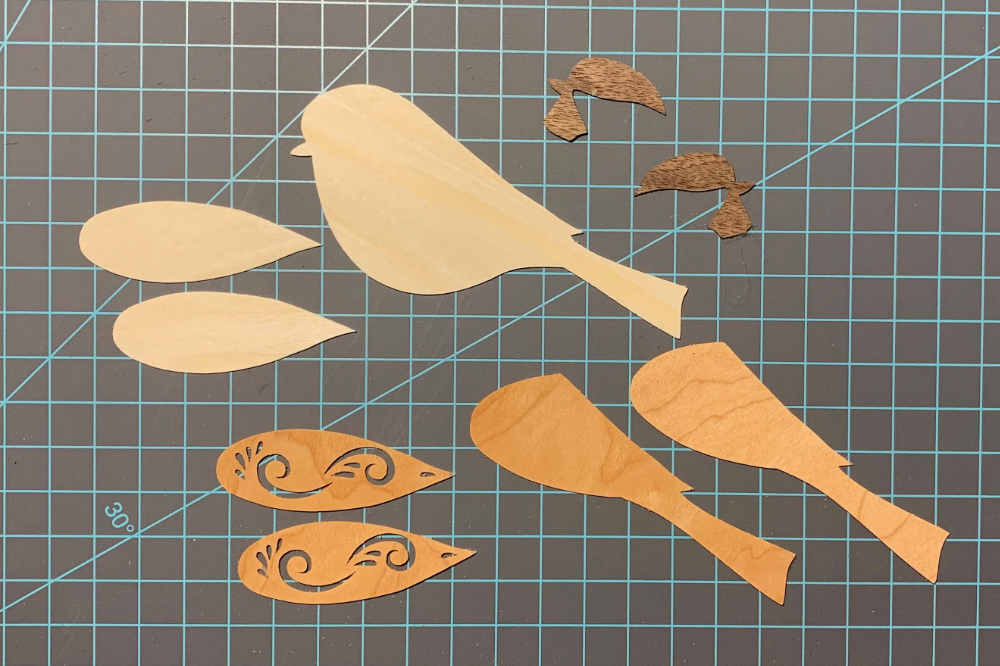
Real Wood Paper has an article about cutting with a Cricut machine. I found that I needed to set the cutting tool pressure to “more” for the cut to go all of the way through the wood.
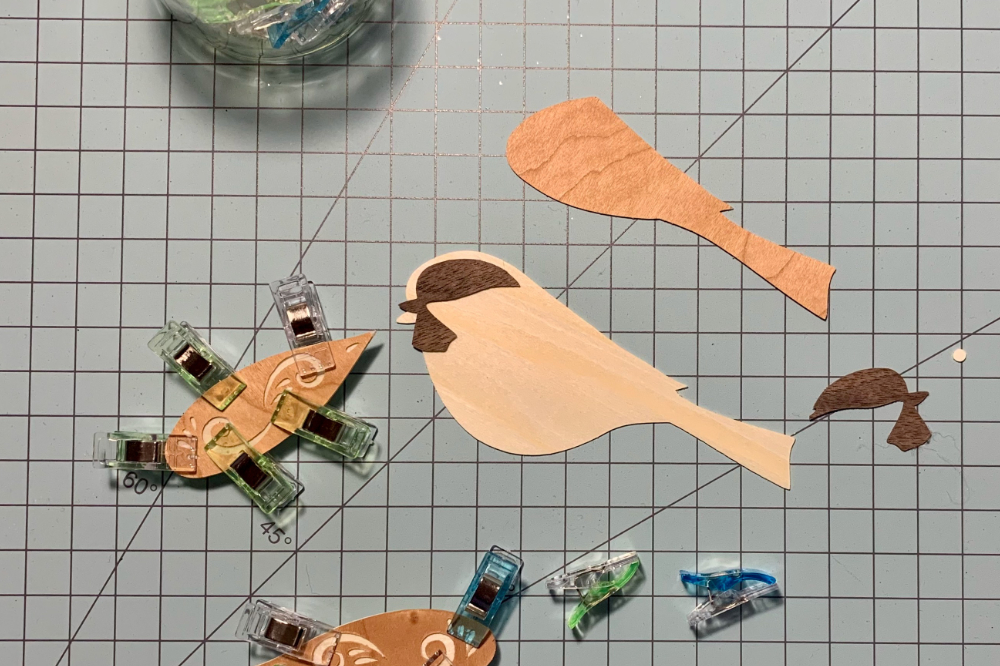
I used Elmer’s CraftBond Quick Dry Glue to glue the pieces together. The wood wants to curl once you apply the glue with a paintbrush, so the glue needs to set with the parts are under pressure. I started by setting the glued pieces under a stack of books and then switched to using sewing clips to hold the pieces in place while they dry.
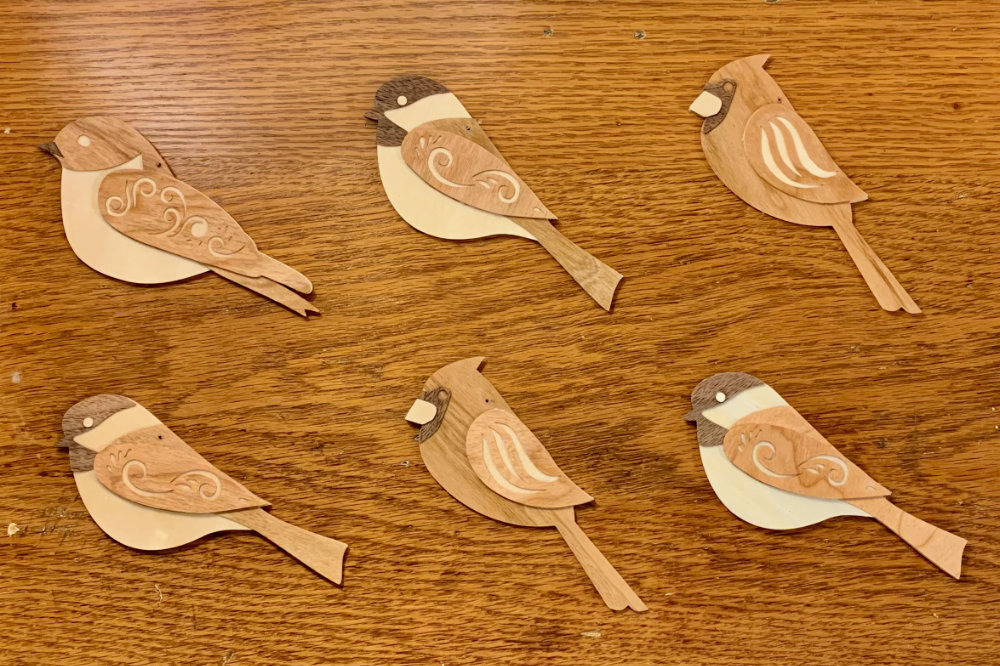
A coat of polyurethane, and they’re ready for gifting and hanging!




Very pretty! I’m sure you will find many uses for your new Cricut! Have fun… Jan in MA
Just fabulous. They would make a fantastic addition to any Christmas tree. xxx
Oh my goodness! I have looked a few times at Cricuts and it was just too much to decide. Thank you for doing the research and for devising the pattern.
Cool!
Those are wonderful!
Merry Christmas to you and your family..
I like birds and those look amazing! Even more beautiful than your felt birds!❤️
Thank you! 🙂
Love these! Are they available to purchase?
They are not – but I’m flattered that you’ve asked! We’ll see down the road.
They are lovely. Will you be sharing your SVG file?
I’m not sure yet – I’m still a novice at this!
These are beautiful! A very nice extension of your previous work. I can predict what next year’s auction wreaths will have! Great job:)
Oooh. I hadn’t even thought about next year’s auction yet. Great idea!
I’ve never heard of wood paper. What you created with your Circuit is inspiring. Thank you for continuing to share and inspire. Happy Holidays
I love these and all your creations. I am wondering if you’ve given any more thought to sharing the svg files?
I’ve been asked this before and I’m such a novice with the Cricut that I’m a bit hesitant, but I shall look into doing so.
Please put together bird kits. These wood birds are breathtaking!! I’m 75 and will NOT be buying a Cricut! I would, however buy a precut kit!! You are an incredible artist !!
I may get to them at some point!
Your inlays are beautiful! I am interested in purchasing wood veneer inlays of animals and birds. Do you do such a thing? Or can you custom make marquetry? I want to use these on the top of wooden boxes. Matt….
Thank you. I do not make these for sale – they are but a hobby.